When to Replace Ear Pads, Ear Tips, and Other Headphone Parts
Published Updated
Worn pads, tips, and cables can quietly undermine comfort, sound, calls, and noise isolation long before the headphones themselves are finished.
A favorite pair can go from pleasantly invisible to oddly irritating in a few months: the ear cup starts pinching, an earbud slips during a walk, or the bass seems to have packed up and left. Before replacing the whole thing, inspect the parts that touch your skin and carry the signal. They often wear out first. Replace ear pads when they flatten, crack, peel, smell persistent after cleaning, or no longer make a proper seal. Replace ear tips when they lose their grip, tear, harden, discolor, or stop isolating outside sound. A detachable cable that cuts out when moved is another fixable problem, provided you get the right connector and wiring. Small parts can restore a lot, but compatibility matters more than optimism.
Reading time: 8 minutesBest for: Anyone trying to revive worn headphones or earbuds before replacing them
How wear changes comfort and sound
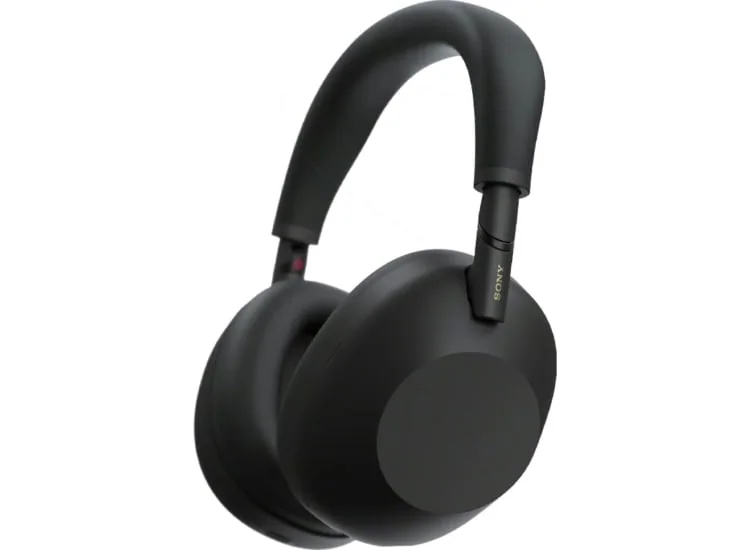
The soft parts are not cosmetic. Over-ear pads create the cushion and seal that hold the drivers, the small speakers inside the headphones, at the intended distance from your ears. When foam compresses or faux leather splits, the headphones may sit lower, press harder, and leak more sound. That leak can thin out bass, make outside noise more noticeable, and reduce the practical effect of active noise cancellation, or ANC, which uses microphones and processing to reduce steady background noise.
Ear tips do the same job on a smaller scale. A tip that no longer seals the ear canal can make an earbud sound bright, weak, or strangely distant, even when nothing is wrong with the electronics. It can also make you turn up the volume to overcome traffic, gym noise, or a chatty train car. If a pair suddenly sounds less satisfying, check the fit and the condition of the contact parts before blaming the drivers.
When ear pads need replacement
Look closely at the pad surface and foam. Flaking coating, exposed foam, deep creases, sticky residue, tears, and a permanently flattened profile are clear signs that replacement is due. So is a change you can feel: one side sits lower, the headband suddenly feels tighter, or the cups no longer surround your ears without pressure. Pads can also retain odor after a careful wipe-down, especially after frequent workouts or hot commutes.
Do not wait for a pad to disintegrate if comfort has already changed. On closed-back and noise-canceling over-ear headphones, a tired seal can alter the sound balance and let in more low-frequency rumble. On open-back headphones, which intentionally let air and sound pass through, replacement is still useful for comfort and positioning, though it will not turn them into a quiet-office solution. Replace both pads together so the fit and sound remain even from left to right.
When ear tips need replacement
Replace ear tips when they tear, become stiff, lose their shape, feel slick, or repeatedly work loose despite being the correct size. Silicone tips are durable but can stretch or split over time. Foam tips usually wear faster because they compress to fill the ear canal; once they no longer slowly expand into a secure seal, they have done their job. A tip that has become difficult to clean or visibly discolored is also a sensible candidate for retirement.
Fit is the deciding factor, not the size printed on the package. Try the supplied sizes first, and consider using a different size in each ear if that gives a stable, comfortable seal. The right tip should stay put through normal jaw movement and walking without creating painful pressure. If an earbud still slips with several compatible tips, its shape may simply not suit your ears. No replacement tip can reliably rescue a housing that never sat securely in the first place.
Replacing detachable cables
A detachable cable is worth replacing when audio drops out in one channel, crackles when the plug moves, the microphone fails, or the jacket is split near a connector. First rule out lint in the headphone jack or device port, and test the headphones with another source if possible. A loose plug can mimic a failing cable, while a problem that follows one ear cup may point to the headphone socket rather than the cable itself.
Connector details are where easy repairs become expensive mistakes. A 3.5 mm plug is common, but the cup-end connection may be 2.5 mm, 3.5 mm, MMCX, two-pin, proprietary, or shaped to fit a recessed socket. Some cables also use different internal wiring, particularly those with balanced connections, which separate the left and right signal paths for compatible audio equipment. Match the exact headphone model, connector type, plug shape, and microphone needs. Never force a plug that almost fits.
Finding compatible replacement parts
Begin with the exact model name, not just the brand and product family. Manufacturers often revise pad clips, ear-tip nozzle sizes, cable sockets, and charging cases between generations that look nearly identical. Check the model number on the headband, ear cup, original box, companion app, or device settings. Then compare product photos and measurements with the original part, including the mounting ring, attachment tabs, nozzle diameter, and any cutouts for sensors or microphones.
Third-party replacements can be useful, but read the description as a compatibility document rather than a promise. Pads with thicker foam or a different material can change clamp feel, ear space, heat, and sound. Tips with a narrow bore, the opening through which sound travels, may alter the tonal balance compared with a wider bore. For wireless earbuds, replacement charging cases are especially model-specific and may need pairing before they work. Keep the old part until the replacement is installed and confirmed.
Caring for new pads and tips
A little routine care slows the grimier side of ownership. Wipe ear pads and silicone tips with a soft, lightly damp cloth after sweaty use, then let them dry fully before storage. Remove detachable silicone tips periodically and clean them according to the headphone maker's instructions. Keep moisture out of speaker meshes, charging contacts, ports, and seams. Alcohol, harsh cleaners, and soaking can damage coatings, adhesives, foam, and water-resistant seals.
Store headphones where pads are not crushed under books or jammed against the bottom of a bag. Put earbuds back in their case only when they are reasonably dry, and clear pocket lint from the case wells and charging contacts with a dry, soft tool. Avoid pulling cables out by the wire; grip the plug instead. These habits are unglamorous, but they preserve the seal, charging reliability, and comfort that made the headphones enjoyable in the first place.
What this guide helps you understand
When headphones become uncomfortable, loose, quieter, or less isolating, inspect the pads, tips, and cable before replacing the entire pair. A correct replacement part can restore the fit and sound you miss, while an incompatible one can create a new problem.
Confirm the exact headphone or earbud model number before ordering pads, tips, cables, or a charging case.
Compare the original part's attachment style, dimensions, and connector type with the replacement listing.
Clean and dry the headphones before installing new pads or tips.
Technique notes
Replace left and right ear pads as a pair, even if only one looks worn.
A changed ear-tip size can improve stability, but it can also change the sound and noise isolation.
Keep the original cable or pad until the replacement has been fitted successfully.
Safety note: Do not use damaged cables with exposed wiring, and avoid cleaning headphone electronics with liquid or sharp tools.