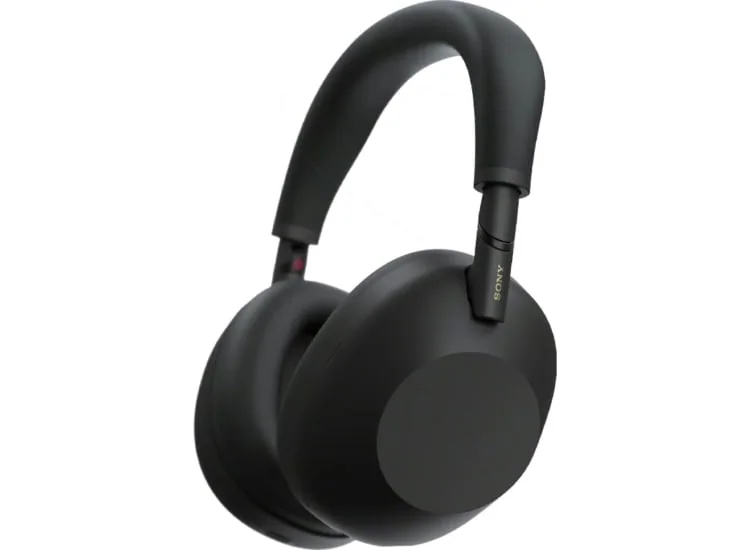
Worn ear pads and ear tips can make familiar headphones less comfortable, less secure, and noticeably worse at blocking outside sound.
The slow slide from "these are fine" to "why do these suddenly feel annoying?" often starts at the part that touches your skin. Flattened ear pads can pinch or leak sound. A tired ear tip can turn a dependable earbud into something that needs constant readjusting on the sidewalk. Replace those soft parts when they no longer make a comfortable seal, not only when they look shabby. Fresh, compatible pads or tips can restore the fit, passive isolation, and intended sound balance of headphones you already like, often for far less than replacing the whole pair.
Reading time: 8 minutesBest for: Anyone whose headphones have become uncomfortable, loose, or less isolating
Signs ear pads or ear tips are worn out
The obvious clues are peeling faux leather, exposed foam, cracked silicone, torn mesh, or a tip that will not stay attached. Do not wait for visible damage, though. Ear pads can lose their spring long before the covering fails, leaving the cups closer to your ears and the headband doing more of the clamping. Ear tips can become slick, stiff, misshapen, or permanently stretched around the nozzle, even when they still look presentable from a distance.
Pay attention to changes that arrive gradually: more outside chatter on the train, bass that seems to have thinned out, a need to turn up the volume, or one earbud that starts backing out after ten minutes. With in-ear models, a secure seal is the gentle closure between the tip and ear canal. When that seal breaks, sound isolation drops and the low end often goes with it. If cleaning does not restore the fit, replacement is usually the sensible next move.
How worn pads change comfort and isolation
Over-ear pads do more than cushion the side of your head. Their depth, shape, and foam density help position the driver, the small speaker inside the headphone, at a particular distance from your ear. When pads flatten, the driver sits differently and the cup may no longer seal around the ear. That can make a pair feel brighter, less full, or oddly uneven, especially if one pad has compressed more than the other.
Ear tips have an even more immediate job. A tip that is too small, too worn, or too shallow lets outside noise in and lets bass escape. Listeners sometimes blame the earbuds for weak sound or disappointing active noise cancellation, called ANC, when the real problem is physical fit. ANC uses microphones and processing to reduce steady external noise, but it works alongside passive isolation from the tip. A leaky fit asks the electronics to rescue a problem they cannot fully solve.
Find the correct replacement part
Begin with the exact headphone model, including any generation or version number. A pad that looks nearly identical may use a different mounting lip, clip ring, adhesive frame, or twist-lock fitting. For earbuds, check the nozzle shape and diameter, the small stem where the tip attaches. Some brands use proprietary tips, while others accept standard silicone or foam options. "Universal" can mean broadly compatible, not guaranteed to fit your particular pair.
Choose materials with the tradeoff in mind. Silicone tips are washable, durable, and commonly included with everyday earbuds. Foam tips expand gently in the ear and can improve grip and isolation for some people, but they wear faster and need more frequent replacement. Over-ear pads in protein leather or faux leather often seal well and are easy to wipe down, while velour and fabric can feel cooler but may admit more sound. A different material can change comfort and sound, so aim first to restore the original design rather than treating replacement pads as a casual cosmetic swap.
Replace over-ear pads carefully
Work on a clean table with good light, and take a few photos before removing anything. Many pads pull away from a plastic lip around the ear cup; others rotate off, unclip, or attach to a removable mounting plate. Use your fingertips before reaching for a tool. A metal prying tool can scar a cup, tear a thin mounting flange, or slip into the driver grille. If the old pad is held by adhesive, lift slowly and remove residue only with a method appropriate for the headphone's finish.
Before fitting the new pad, compare its inner opening, seam position, and attachment edge with the old one. Align the pad at one point, then work around the cup in small sections rather than stretching it hard across the entire rim. Once installed, run a finger around the edge to make sure no part is folded or unseated. Put both headphones on and listen at a moderate volume to a familiar track or spoken voice. A lopsided seal can make one side seem quieter or less bassy, even when the electronics are fine.
When to Replace Headphone Ear Pads and Ear Tips 5
Replace both over-ear pads as a pair, even if only one looks worse. Your head compresses each side differently, but matching pads give you the best chance of even comfort, seal, and sound. The same logic applies to left and right ear tips when you use matching sizes. If one ear needs a different size to stay secure, that is normal; ears are not mirror-image parts. What matters is that each side feels stable without pressure or a need to keep pushing it back in.
For true wireless earbuds, remove the old tip by gripping the base rather than tugging the thin outer edge. Press the new tip onto the nozzle until it sits fully and securely. Then check that the earbuds still fit in their charging case and that the lid closes without forcing it. An oversized or poorly seated tip can prevent charging contacts from meeting, which is a particularly irritating discovery when the case has been in a bag all day. A quick fit check now is kinder than a dead earbud later.
When to Replace Headphone Ear Pads and Ear Tips 6
Cleaning can extend the life of pads and tips, but it cannot revive compressed foam, cracked coverings, or silicone that no longer grips. Wipe removable silicone tips with a soft cloth and mild soap and water only after checking the maker's care guidance, then let them dry completely before reinstalling. Brush loose debris from over-ear pads gently. Keep moisture away from speaker openings, charging contacts, microphones, and exposed electronics.
After replacement, give the fit a short real-world trial rather than judging it in the first thirty seconds. Wear the headphones through a work call, a walk, or the length of a typical commute. Notice hot spots around glasses, jaw movement, whether earbuds stay put, and how much volume you need in ordinary surroundings. If the new parts feel wrong, do not assume you need a new headphone immediately. A different tip size, material, or correctly matched pad can be the small correction that makes the pair enjoyable again.
What this guide helps you understand
Treat ear pads and ear tips as working parts, not decoration. When they lose their shape or seal, comfort, isolation, bass, and even battery habits can suffer because you may compensate by raising the volume or using more noise cancellation. Replace them with parts made for the exact model, install them patiently, and judge the result during the kind of listening you actually do.
Confirm the exact headphone or earbud model and generation before ordering.
Check how the original pads or tips attach, including any mounting ring, clip, twist-lock, or proprietary nozzle.
For earbuds, test that replacement tips fit securely and allow the charging case to close and charge normally.
Replace left and right over-ear pads together for a more even seal and sound.
Technique notes
A fresh ear tip may need a different size than the one you used when the earbuds were new.
Foam tips can improve grip for some ears but generally need replacement sooner than silicone.
If a replacement pad changes the seal or driver distance, the sound may change too.
Safety note: Keep listening volume moderate, especially while checking a new ear-tip seal. For walking, running, or cycling near traffic, use an awareness-friendly setup and keep surrounding sounds audible.